This is a costume I recently finished for my niece. It was inspired by a costume she wore in her ballet performance.
I wanted to try my hand at handmade lace and this proved itself as an excellent opportunity for that. I studied needle lace-making techniques (point, punto in aria, point d’Alençon) in historical and modern texts and found far more information in the historical texts. However, I did glean some information from online lace-making websites (especially about Romanian point) and found Burano lace especially fascinating. It was said it takes a lace-maker 7 hours per centimeter of finished lace. At first I was skeptical about this number, but found it to be fairly accurate after considering the labor hours involved in setting up the design before one stitch is even made. After that the work moves at an enjoyable pace as far as handcrafted fiber-arts go.
So, first I needed to construct my lace-making pillow. I kept it simple: I used a bolster fiberfill, covered it in (smaller) canvas, then made another larger sleeve to encase the pillow and a sturdy cardboard tube. Soon after, I began a small motif…. it remains unfinished. It came along fine, but after the “help” of a 2-year old and the curiosity of a 5 year old who wanted to try her hand at it, I figured I needed to put that off for a while. So I jumped right into my lace overlay for the ballet dress. To avoid taking on the task of learning bobbin lace, I opted for pre-made tapes. I did look into crocheted tape patterns, but found in my lace drawer a reasonable substitute I had inherited from my grandmother. It was white, but also cotton… more on that later. 
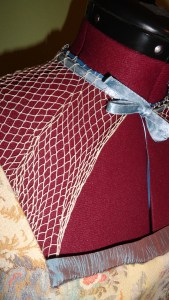
I flat seamed three strips of wide ribbon for the base fabric, drew my design, pinned and sewed the tapes to the ground. In this photo it is over the pink satin. Then I moved on to the needle lace. My first few attempts were fairly inconsistent, but I figured they’d be lost in the gathers. That was the least of my worries, though, after my 2-year old took a pair of scissors to it. The majority of damage was only to the background ribbon so I pieced it behind some of the tapes and hopefully it, too, will be lost in the gathers. After completing the lace it hung in my sewing room for a very long time…like months. I then half drafted, half draped the pattern on my daughter’s doll. At this point, I gained an appreciation for whomever designed the original costume, because I would have stopped very short of all the excess fluff and enhancements. Each sleeve had 4 parts- not counting trim.
Here is the bodice finished with the sleeves added:
I sewed each pearl separately and ran lines of tambour embroidery in two directions to create the diamond pattern. (FYI: tambour on satin is very difficult.) 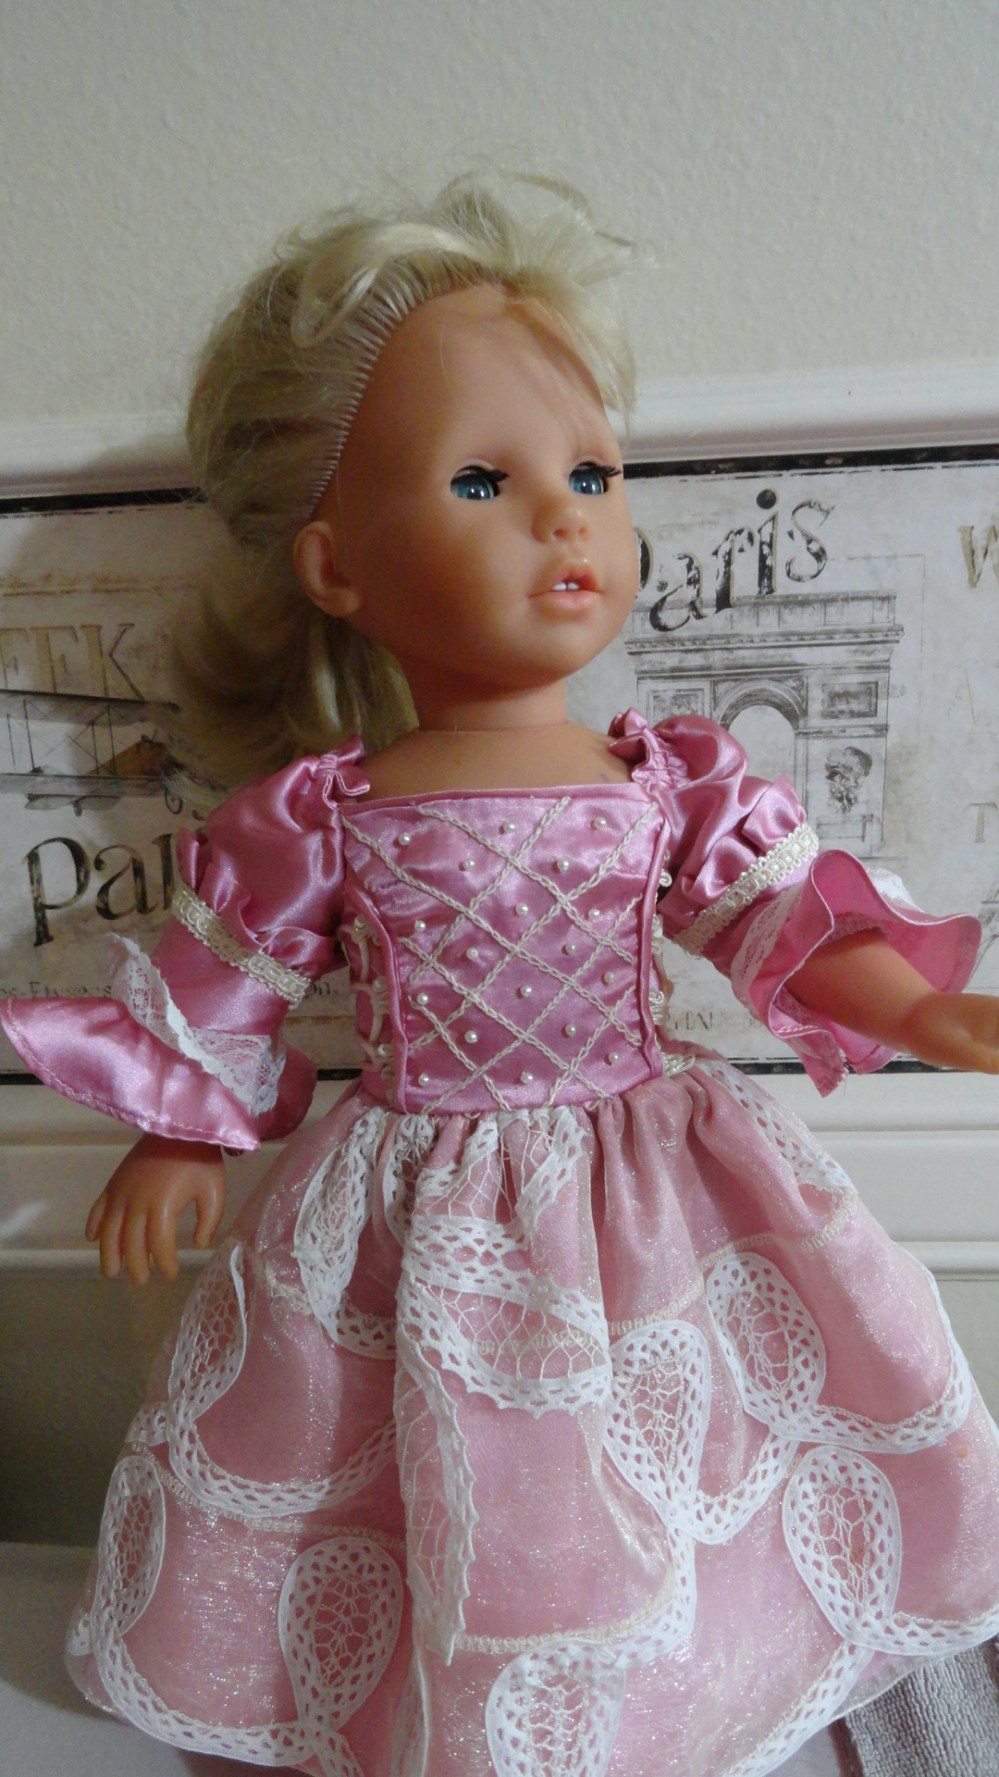
Sewed the top to the bottom then realized I hadn’t dyed the cotton tapes. D’oh. 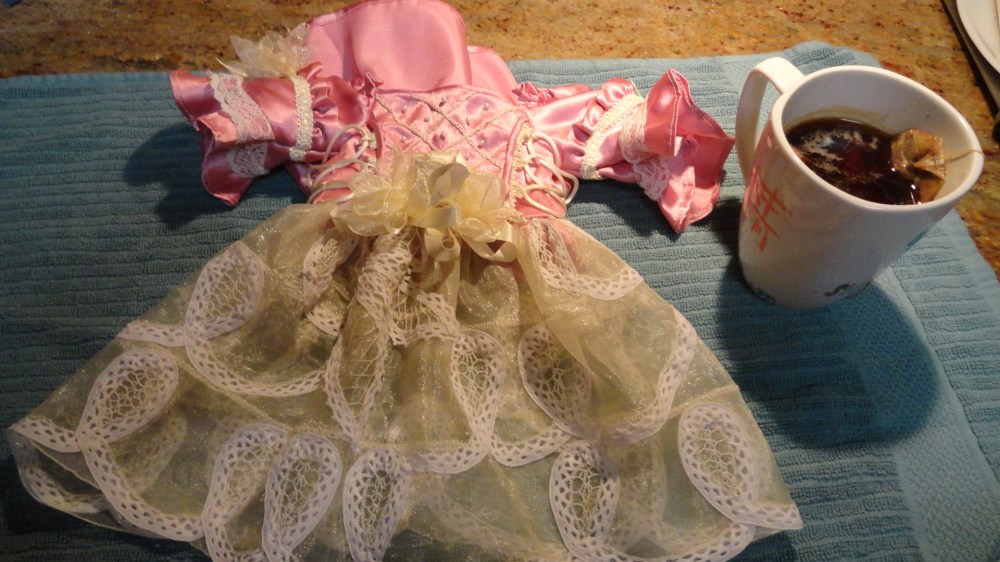
Carefully pulled the satin out of the way and with the help of two extra hands managed to tea-dye the tapes to the proper color without causing too much trauma to the rest of my work. As you can see, by this time I had added the flowers.
The flowers were constructed by cutting circles of satin (polyester, obviously) and held them close to a flame to melt and curl the edges. Then sewed them together. Some are satin, some are organza. Also made headpiece: the pink flowers are some very nice crepe paper I had ordered online and had in my stash/hoard.
Here is the finished dress on a different doll because when children see you playing with their doll, they suddenly become insistent that they need it more than you and immediately:
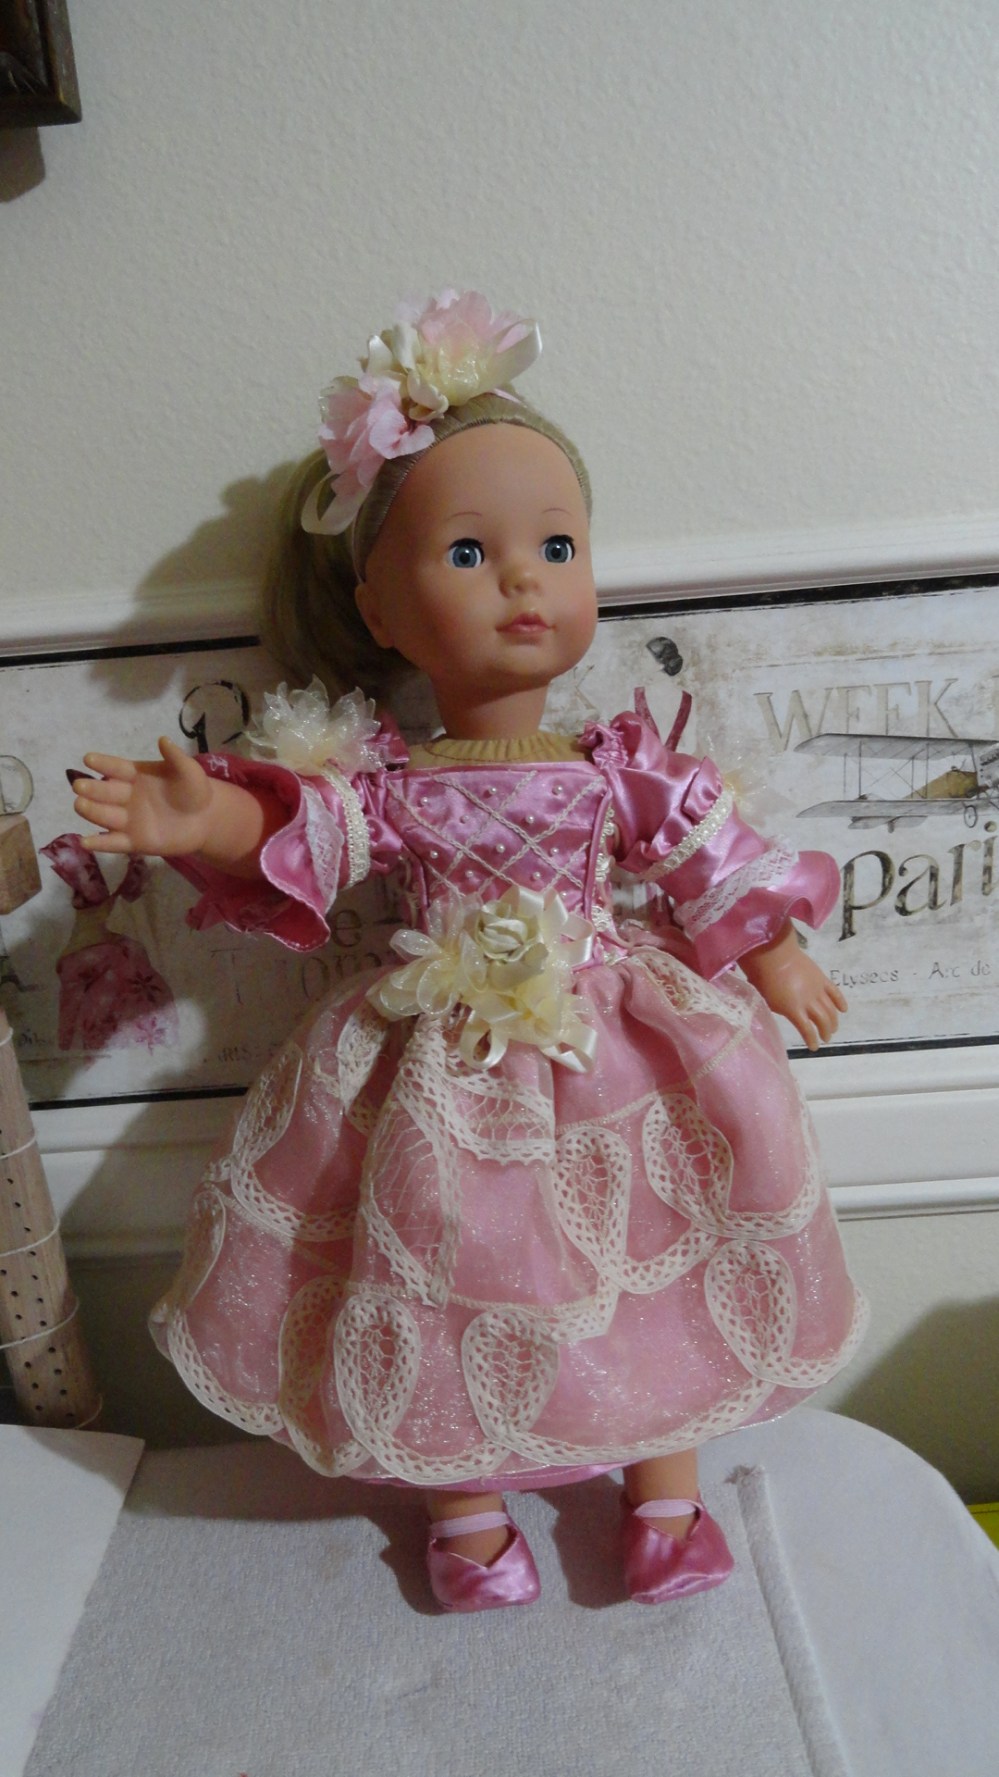
Notice the shoes? They turned out so badly I couldn’t even send them to my niece. By that point I was not keen on making more, so her doll will have to dance the Nutcracker barefoot. Here is the final dress, pantalettes, and a photo of the inspiration. 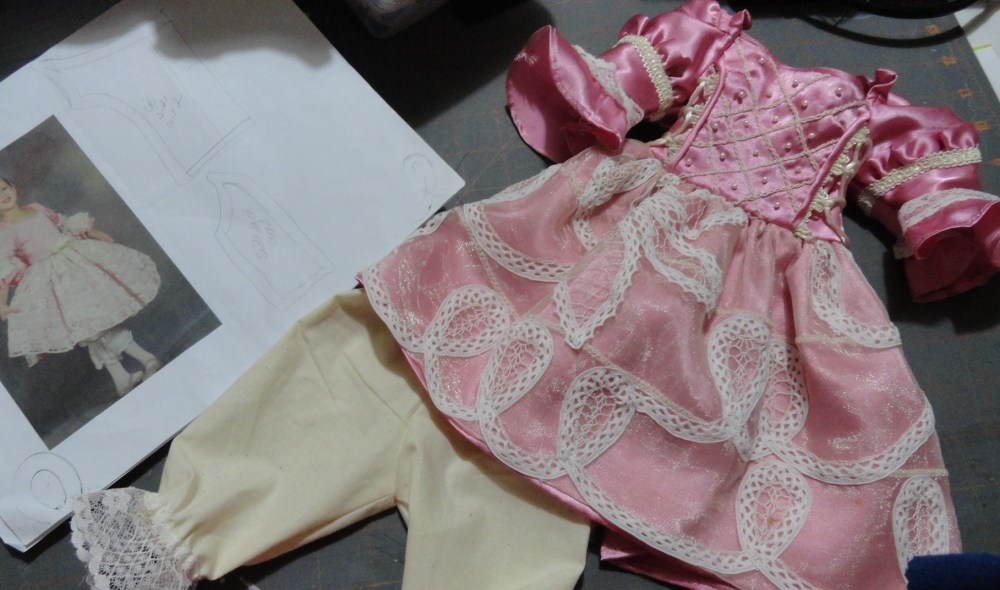
It’s in the mail now. I hope she likes it.

Amazing!!! Future generations will show this on Antiques Roadshow!
LikeLike